


Easy way to setup "Tailwind" in React & Next App
How to configuring and customizing Tailwind installation in React.


To create an application, the first step is very necessary which framework to pick for creating UI design. If you check the internet you will find so many CSS frameworks out there, including Bootstrap, Foundation, Tailwind CSS, material ui, Bulma, semantic, and many more. That’s creating confusion among various frameworks.
I'm sure many of you like me, have gone through the same kind of situation at least a few times in frontend development careers.
In this blog, I will talk about Tailwind CSS. In a few years, Tailwind CSS framework is gaining popularity among other CSS frame work, because of the customization it offers and its ease of use.
Here are some of the Opinionated libraries
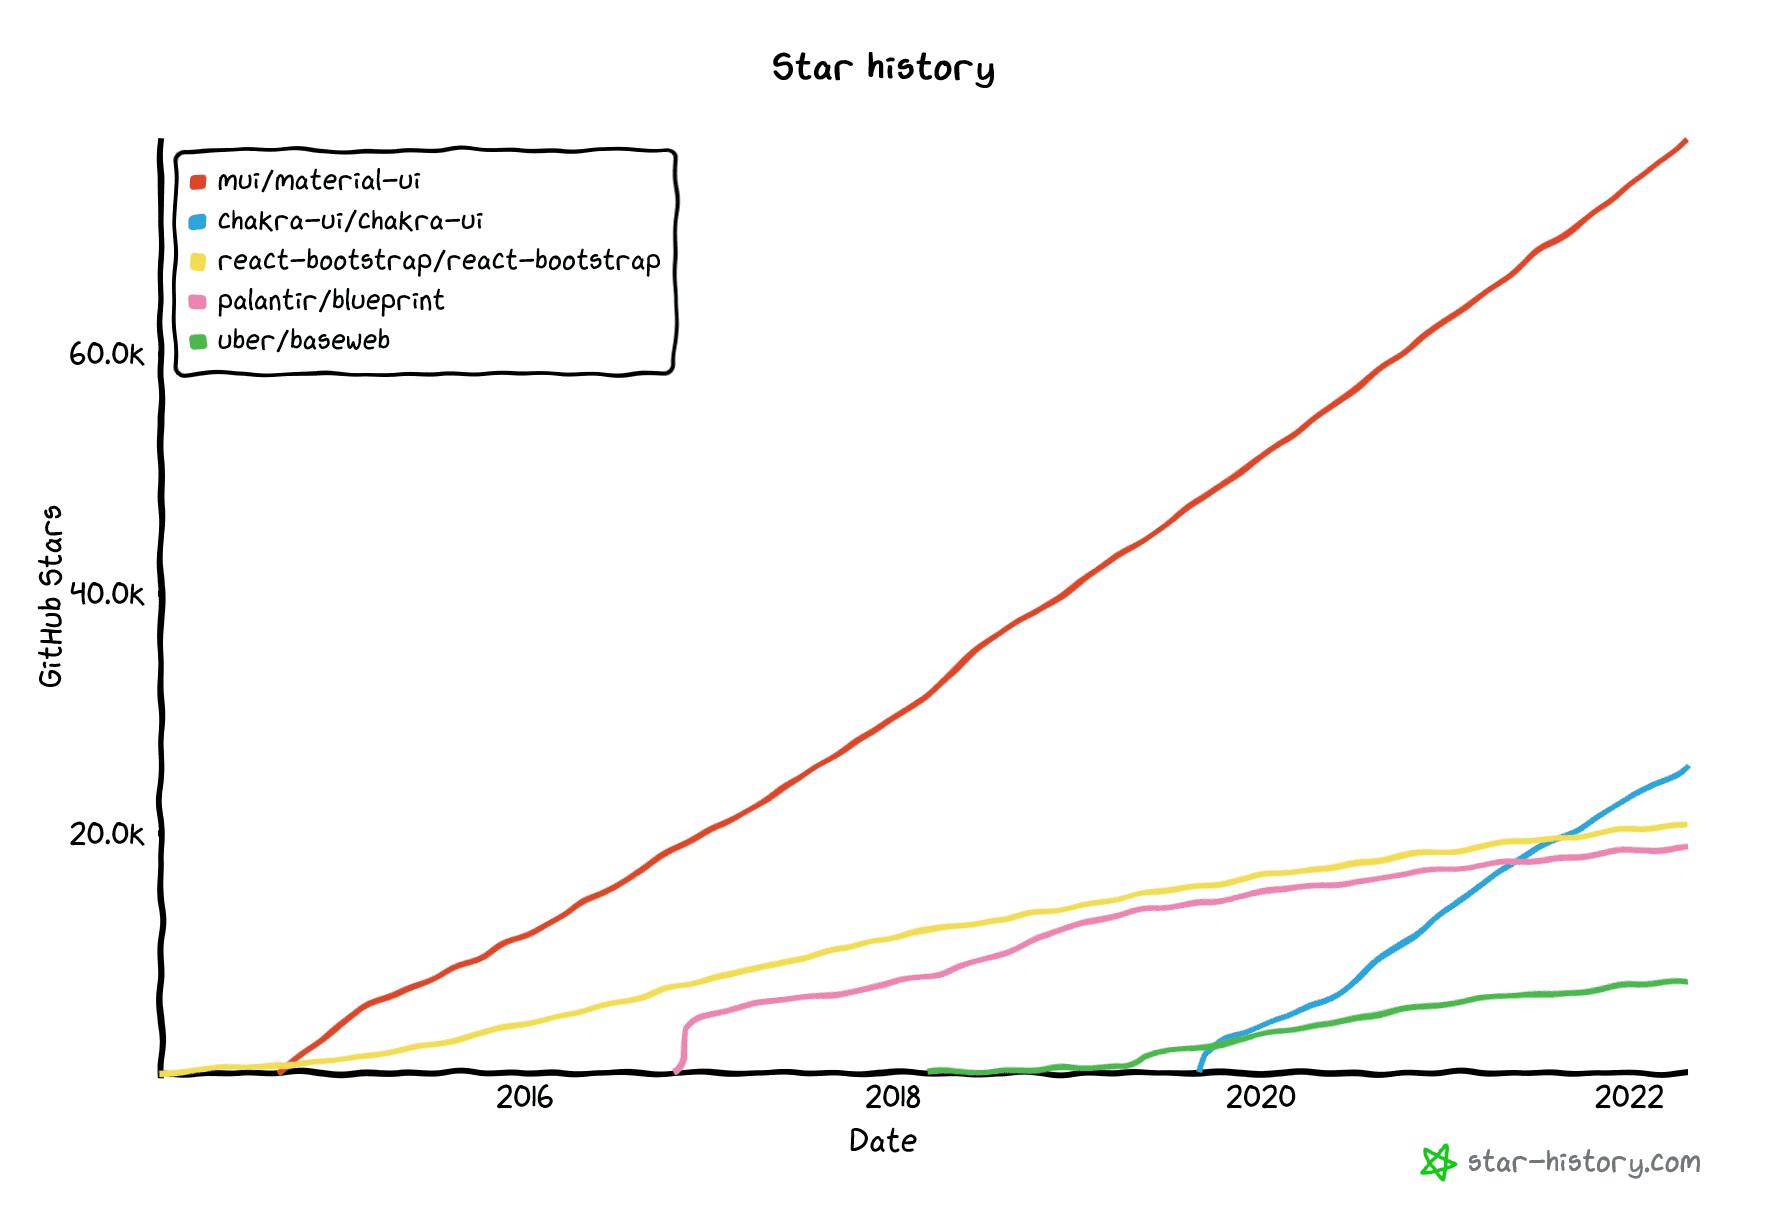
credit: star-history.com
and some of the headless ones
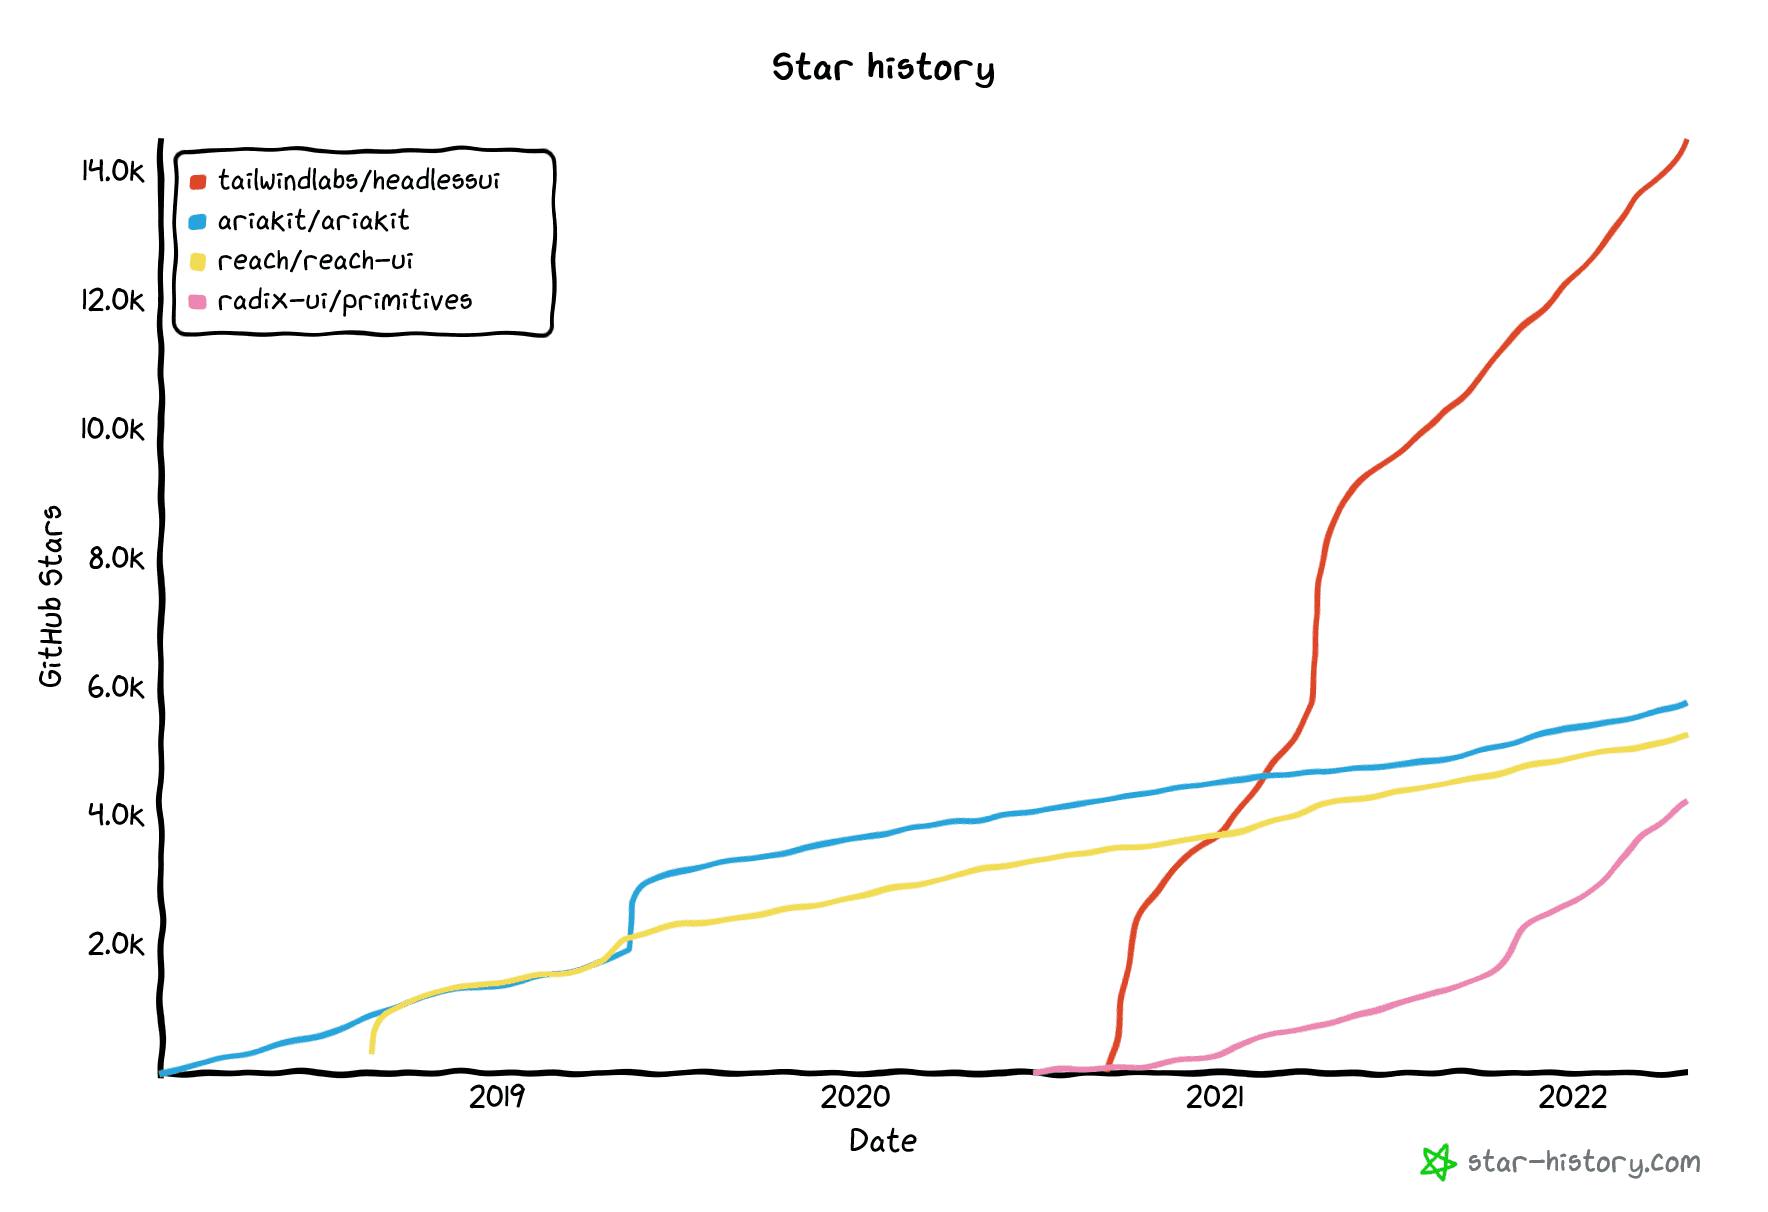
credit: star-history.com
Here is it...
What is Tailwind CSS?
Tailwind CSS is a utility-first CSS framework designed to enable users to create applications faster and easier.
Tailwind CSS utility classes control the layout, spacing, color, typography, shadows and more to create a completely custom component UI — without leaving your HTML or writing a single line of custom CSS.
Further in this blog, Just follow the step-by-step approach to installing Tailwind CSS into your React project and get started using Tailwind’s CSS classes for styling.
Step 1: Create React Project
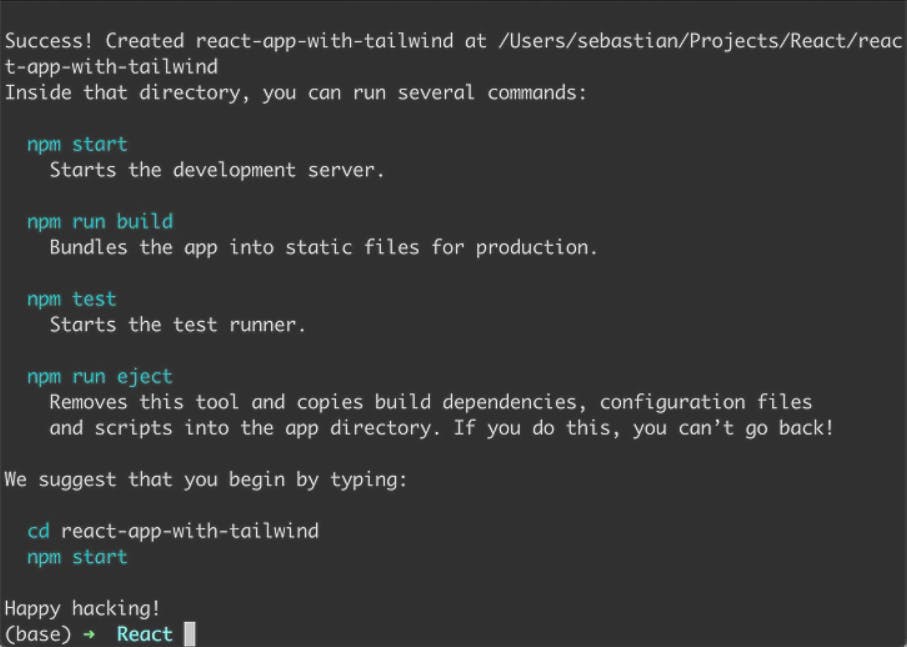
Create new React project is the very first step. The easiest way to do so is to use the create-react-app script on the command line:
$ npx create-react-app react-app-with-tailwind
$ cd react-app-with-tailwind
If it works good, You will see following output after running the create-react-app script via the npx command:
Step 2: Install Tailwind CSS
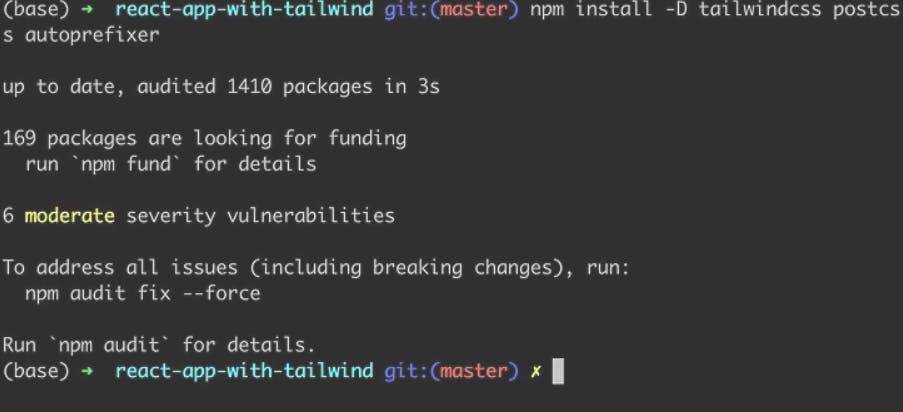
After created new React project in react-app-with-tailwind folder. After that you can add Tailwind CSS library and it’s peer dependencies postcss and autoprefixer by using the Node Package Manager (NPM) in the following way:
$ npm install -D tailwindcss postcss autoprefixer
Next, we’re ready to create the default configuration files for Tailwind in the project folder.
Step 3: Generate Configuration Files
In order to configure everything we need for Tailwind in our React project we do need two configurations files:
tailwind.config.js
postcss.config.js
Luckily those two files can be generated by executing the following command in the project folder:
$ npx tailwindcss init -p
This makes sure that not only the files are created but also that a default configuration structure in is already available within these files.
Step 4: Configure Path To Template Files
Inside tailwind.config.js we need to specify the path to our React template files by adding the following configuration setting:
// Inside tailwind.config.js
//file extension js, jsx, ts, and tsx are covered within the src subfolder.
module.exports = {
 content: [
"./src/**/*.{js,jsx,ts,tsx}",
],
 theme: {
 extend: {},
 },
 plugins: [],
 }
Step 5: Add Tailwind Directives
After that following Tailwind CSS directives into file index.css:
@tailwind base;
@tailwind components;
@tailwind utilities;
That’s it. We’re ready to go! Let’s make use of Tailwind’s CSS classes within our main React component in App.js.
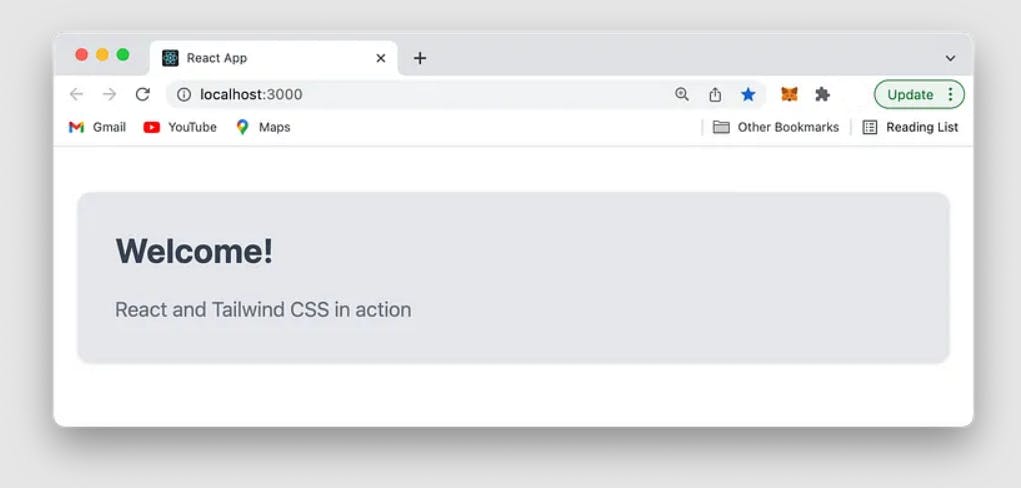
Step 6: Use Tailwind CSS In Your React/Next App
function App() {
  return (
    <div className="container mx-auto bg-gray-200 rounded-xl shadow border p-8 m-10">
      <p className="text-3xl text-gray-700 font-bold mb-5">
        Welcome!
      </p>
      <p className="text-gray-500 text-lg">
        React and Tailwind CSS in action
      </p>
    </div>
  );
}
export default App;
Start the development web server by using the following command:
$ npm run start
Congratulations Dev !!
If you reach at the end of this blog. Now you are part of #tailwind family.